Submitting Data Collections
This page provides instructions for citing data by submitting Data Collections to the ATLAS-D2K Data Explorer.
If you have any questions or feedback, please send them to your consortium’s help email: help@atlas-d2k.org.
If you are creating a Collection for an upcoming paper, please make sure you are citing it correctly! You may find citation instructions here: https://www.atlas-d2k.org/citing/
Table of Contents
- 1. Joining the Globus Group
- 2. What is a Collection?
- 3. Submit Metadata Fields
- 4. Link to Publications
- 5. Provide Protocols and Contributors
- 6. Link to your data records
- 7. Reviewing and Submitting Data Collections
- 8. Deleting Data Collections
1. Joining the Globus Group
To get editing access, join the relevant Globus group and make sure you are logged in. Email help@atlas-d2k.org for assistance. For detailed information, see Accessing ATLAS-D2K Resources.
2. What is a Collection?
In the ATLAS-D2K Center, we use the Collection to gather various data types together. One of the major characteristics of a Collection is that it can have a DOI assigned to it. A Collection is useful anytime you want to group data under one DOI or citation.
Some common use cases include:
- An upcoming publication
- A collection can be properly cited in the paper
- Here is an example of citing a collection (format is based on the Nature scientific data citation format)
Example: McMahon, A. GUDMAP Consortium. https://doi.org/10.25548/BURB-6P44 (2017)
- Readers can unambiguously obtain data referred in the paper → repeatable experiments!
- A published publication
- A collection can refer to the published paper in its description.
- Readers can unambiguously obtain data referred in the paper → repeatable experiments!
- Collaboration
- Create a specific set of data to be used for further discussion or collaboration.
2.1 Overview for creating a Collection
Adding data Collections involves the following steps:
-
Submit metadata. When you first create a Collection record, you will fill out a form to submit metadata about the data described by this Collection.
-
Link to your publication. Link to the publication related to the data in this collection. If this collection is for other sharing purposes, this is not required.
-
Provide protocols and contributors. To provide more complete transparency, reproducibility and provenance, you will link to the protocols used to capture the data in this collection and document the people who handled the data.
-
Link to our data records. This is where you connect this Collection to the data records you are organizing.
3. Submit Metadata Fields
- Use this link to log in and create a Collection. Alternatively, from atlas-d2k.org,:
- In the top-level menu, click Internal, then Data Collections, OR
- From a “Collection” page, you can also click the
Createbutton (you must be logged in to see this button).
-
At a minimum, fill out the essential fields marked with a red asterisk (*). However, filling out more fields enhances data discoverability.
- Upon completion, click
Save.
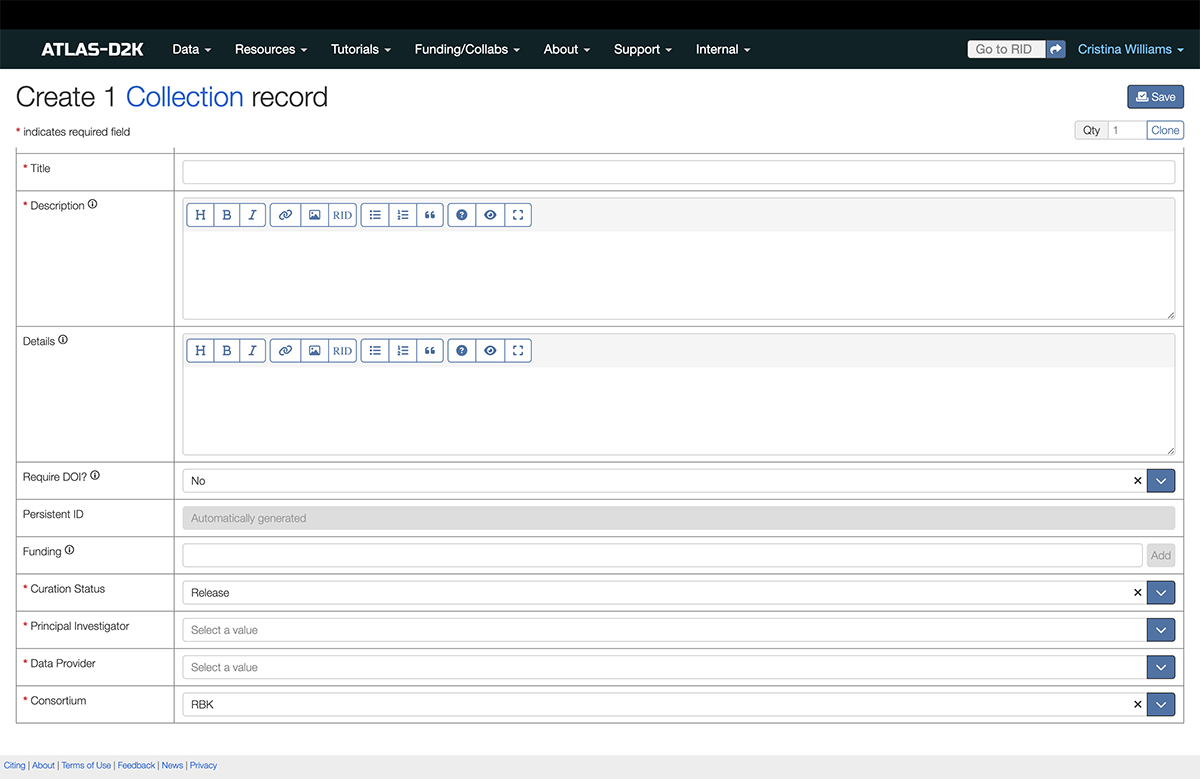
3.1. Fields for Collection Metadata
| Field | Description | Required or Optional |
|---|---|---|
| Title | Provide the title of the Collection (this could be the title of your publication) | Required |
| Description | Provide a useful description of the Collection (for example this could be the abstract of your publication) | Required |
| Details | Use this field if there are other details you'd like to include. | Optional |
| Require DOI? | This indicates to the Hub to generate a DOI for this Collection. Highly recommended for citing in your publication. | Optional |
| Curation Status | Indicates if this record is still being worked on, is being reviewed, is embargoed until publication or has been released to the public. For a complete description of the curation process, see Curation Workflow | Required |
| Principal Investigator | Use the primary Principal Investigator for this collection of data. You may only indicate one PI. | Required |
| Data Provider | Use the institution of the Principle Investigator. | Required |
| Consortium | Indicate the Consortium (GUDMAP, RBK, etc). | Required |
Once you have saved the form, you will see a new Collection record.
You can come back at any time and click “Edit” in the record header to modify this record.
4. Link to Publications
From the Collection record, link to the related publication. In the Publication field, click the Link records button.
If you know your publication has already been entered, search for the title and then click to link to the publication.
Otherwise, click the Create new button and fill out the fields with information about the publication. Click Save when you are finished.
4.1 Fields for Publication Records:
| Field | Description | Required/Optional |
|---|---|---|
| Title | Title of the publication | Required |
| Authors list | List of authors, as they appear in the publication. | Optional |
| Abstract | Abstract of the publication | Optional |
| Publication venue | Name of the journal or publication venue. If this is not available, you may click Create new to add an entry for the venue. |
Required |
| Month | Publication month | Optional |
| Year | Publication year. | Required |
| Volume | Journal volume. | Optional |
| Issue | Journal issue. | Optional |
| Pages | The pages where the publication appears. | Optional |
| PubMed ID | The PubMed ID of the publication. | Optional |
| DOI | The DOI reference. | Optional |
| URI | Link from which the publication may be downloaded. | Optional |
| Publisher Item Identifier | A unique identifier, used by scientific journal publishers, to identify documents. | Optional |
| File URL | Use this field to upload a PDF of the publication. | Optional |
| Curation Status | Keep the default value of Submitted. | Required |
| Principal Investigator | The lead principal investigator of the publication. | Required |
| Consortium | Indicate GUDMAP or RBK. | Required |
5. Provide Protocols and Contributors
After you’ve made the base Collections record, two other fields will appear: Protocols and Contributors. It’s important to include this information for letting users know how specimen were processed and who conducted the protocols.
5.1 Link to Protocols
In the Protocols field, click Link records (one of the buttons on the right side of the screen).
A modal window will appear where you can search for an existing protocol in our database or click Create new to add a new protocol.
5.2 Add Contributors
In the Contributors field, click Add records (one of the buttons on the right side of the screen).
6. Link to your data records
Once the base Collection record is created, now you can add the related data. To the left, you’ll see a Sections list that will take you further down the page to sections for each type of data you can link.
If you don’t see a section for data you want to include, email help@atlas-d2k.org.
-
In each relevant section, click
Link recordsto the right of the section header. - Browse or search for the records you want to add and then click to select them.
- Click Save to add them to the Collection record.
7. Reviewing and Submitting Data Collections
Once you have completed the above fields, here is how the PI can review the Collection (assuming it still has a Curation Status of “In Preparation”):
-
Make sure you are logged in.
-
Go to the Collections search page.
- In the faceting sidebar on the left, choose the following filters:
- Under Curation Status, choose In Preparation.
- Under Principal Investigator, choose your name. Now you should see the data you need to review.
- When your record is approved internally, change Curation Status to Submitted to send it to the Hub (click here for the full Curation Workflow).
8. Deleting Data Collections
Before you can delete the base Collection record, you need to unlink any data records associated with it.
To delete a data collection record:
-
Scroll down the record to the sections for the different data types that were linked to the Collection.
-
In each of these sections, unlink the entries by clicking the ‘x’ icon in the Actions columns.
-
Once all of the related records have been unlinked (deleted), then scroll up to the top of the record and click Delete.