Submitting Protocols
This page provides instructions for adding protocols to the ATLAS-D2K Data Explorer, based on the Nature Protocols format.
If you have any questions or feedback, please send them to your consortium’s help email: help@atlas-d2k.org.
We also have the following training materials available:
- Webinar Slides
- Webinar Replay 12/6/17 (41:12)
- Tutorial Videos (Coming Soon)
Schema
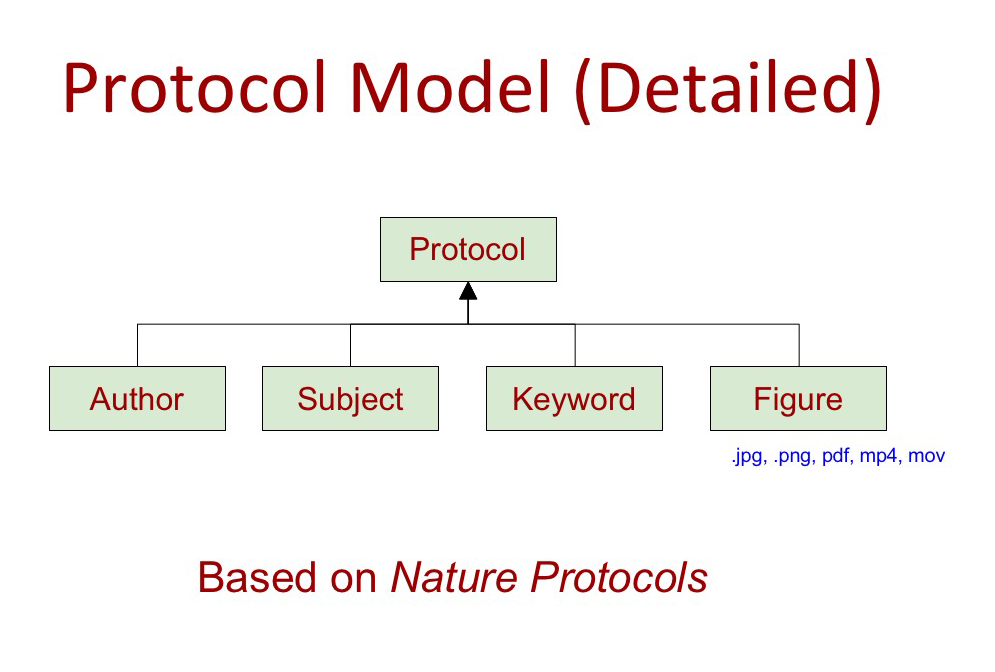
Overview
Adding protocols involves the following steps:
- Make sure you are in the correct Globus authentication group.
- Create a base Protocol record (Required).
- Add at least one Subject Term (Required)
- Add at least one Keyword (Required)
- Add at least one contact Protocol Authors (Required)
- Add Figures, Videos (Optional)
- If a protocol needs updating, create a new one and update the Version field
1. Join the correct group
Follow the instructions on this page. If you’re not sure which group you need to join, please contact help@atlas-d2k.org.
1. Create the base Protocol Record
-
Make sure you are logged in.
-
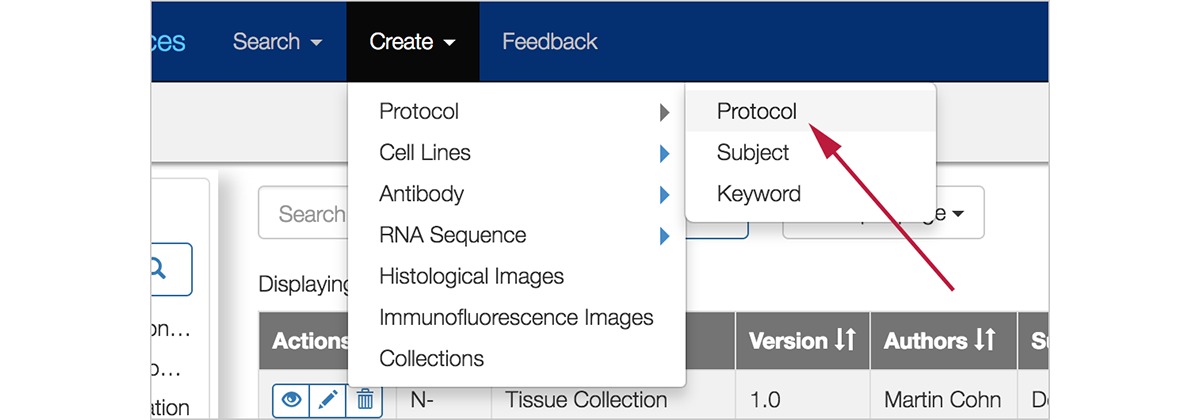
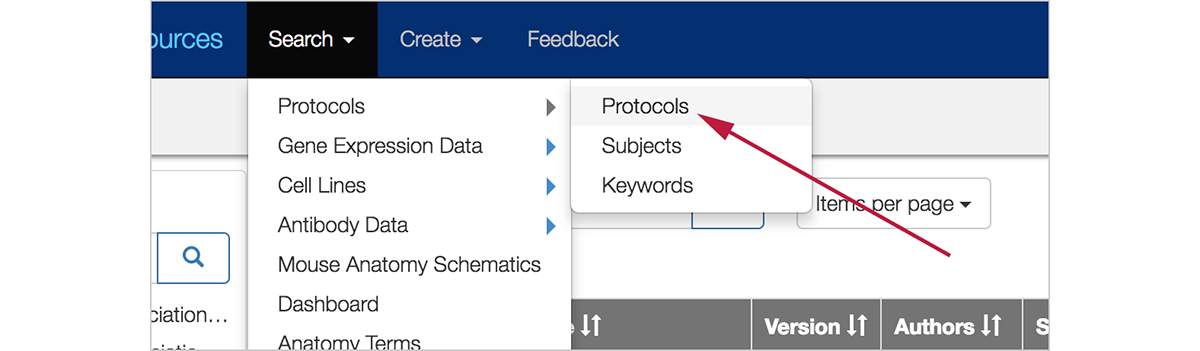
In the top navigation bar, click Internal > Protocol > Protocols.
-
The “Create Protocols Record” form appears (see excerpt below):
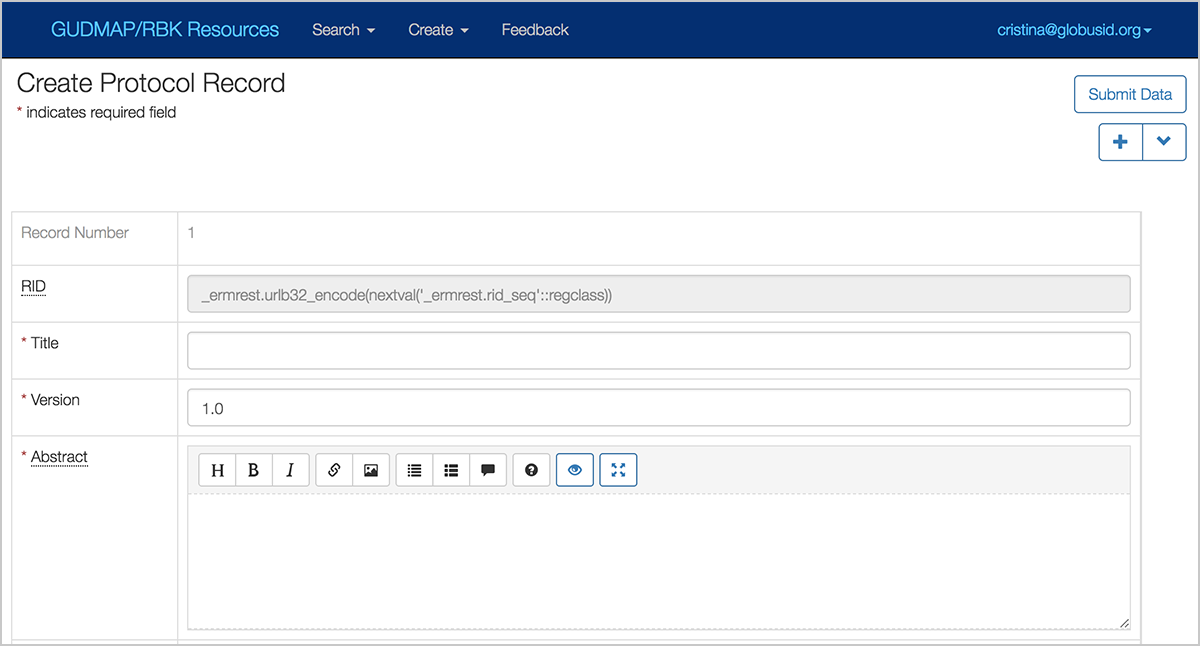
See screenhot of full length form here.
-
Fill in the fields. Note that the following fields are required: (You can format text using Markdown. Find more information about formatting your larger text fields here.)
- Title: Please provide a concise but informative title that describes the protocol to unfamiliar users.
- Abstract: Add a short paragraph describing the protocol further
- Procedure: Enter the actual steps to perform the protocol.
- Data Provider: This is your lab’s institution. If you need to add an institution, please contact the Hub.
- Curation Status: Choose either
- In Preparation (still drafting),
- PI Review (ready for internal approval), or
- Submitted (ready for Hub review). Your data will not be viewable publicly until approved for Release by the Hub. For a complete description of the Curation Process, click here.
- We encourage you to fill out the Anticipated Results field in your protocol to help users know if it worked as intended.
- When finished, scroll back to the top of the page and click Submit Data.
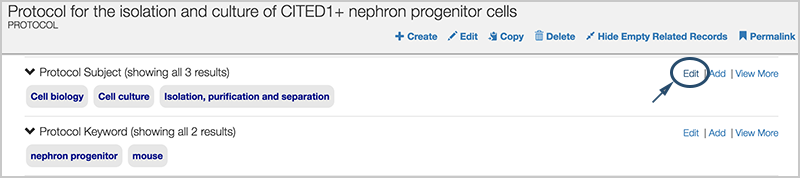
2. Add Subject Terms
Although only one Subject Term is required for a protocol, we highly recommend adding two or three to make your protocol easier to search.
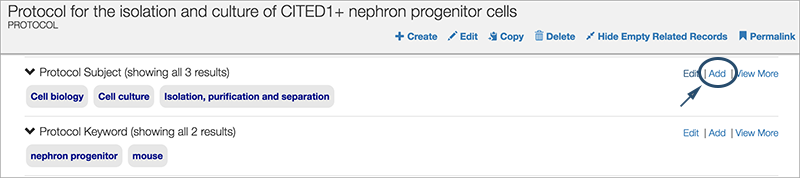
- From the base protocol record you just created, scroll down until you see the section “Protocol Subject”
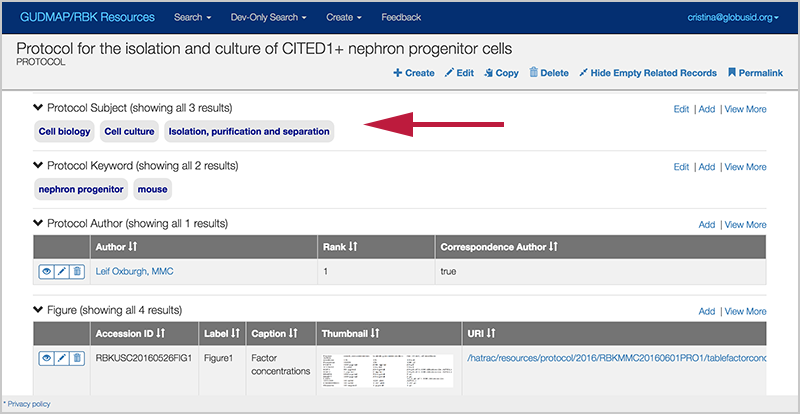
- Click the
Addlink in the upper right corner of the “Protocol Subject” section.
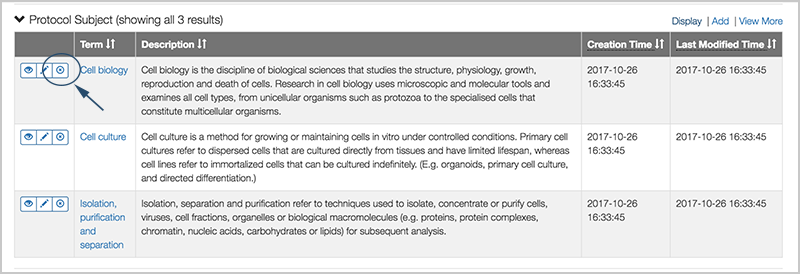
- In the modal window, scroll through the list or start typing a term in the search box to narrow the results.
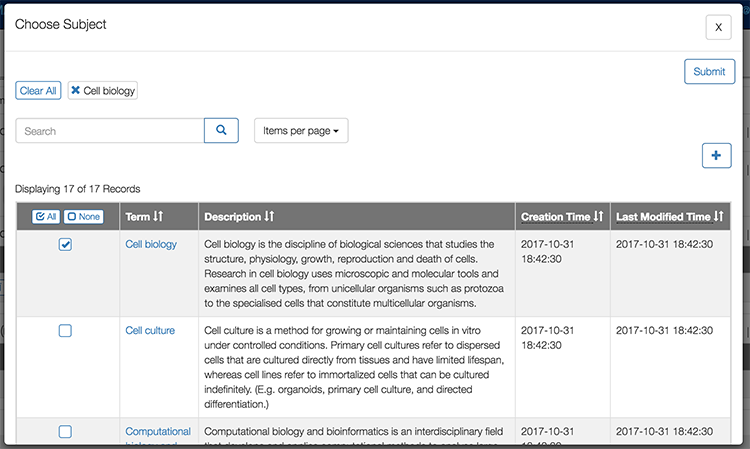
-
Click the checkboxes of your desired subject terms.
-
When finished, click Submit in the upper right corner to save your data.
-
Repeat for each subject term you wish to add.
-
You can always navigate back to the record and click Edit and make changes to your record.
3. Add Keywords
The process for adding Keywords is basically the same as for Subject Terms.
Although only one Keyword is required for a protocol, we highly recommend adding two or three to make your protocol easier to search.
-
If you need to add a keyword, send email to Todd Valerius at todd@valeriuslab.org. Please make sure you’ve searched the existing list before requesting a new term.
-
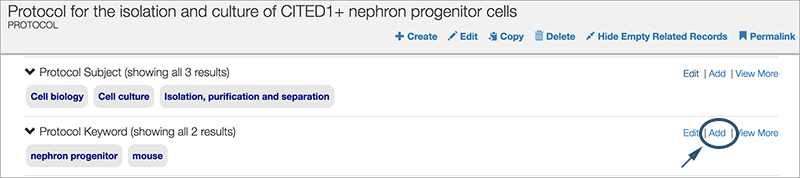
From the base protocol record, scroll down until you see the section “Protocol Keyword”

- Click the
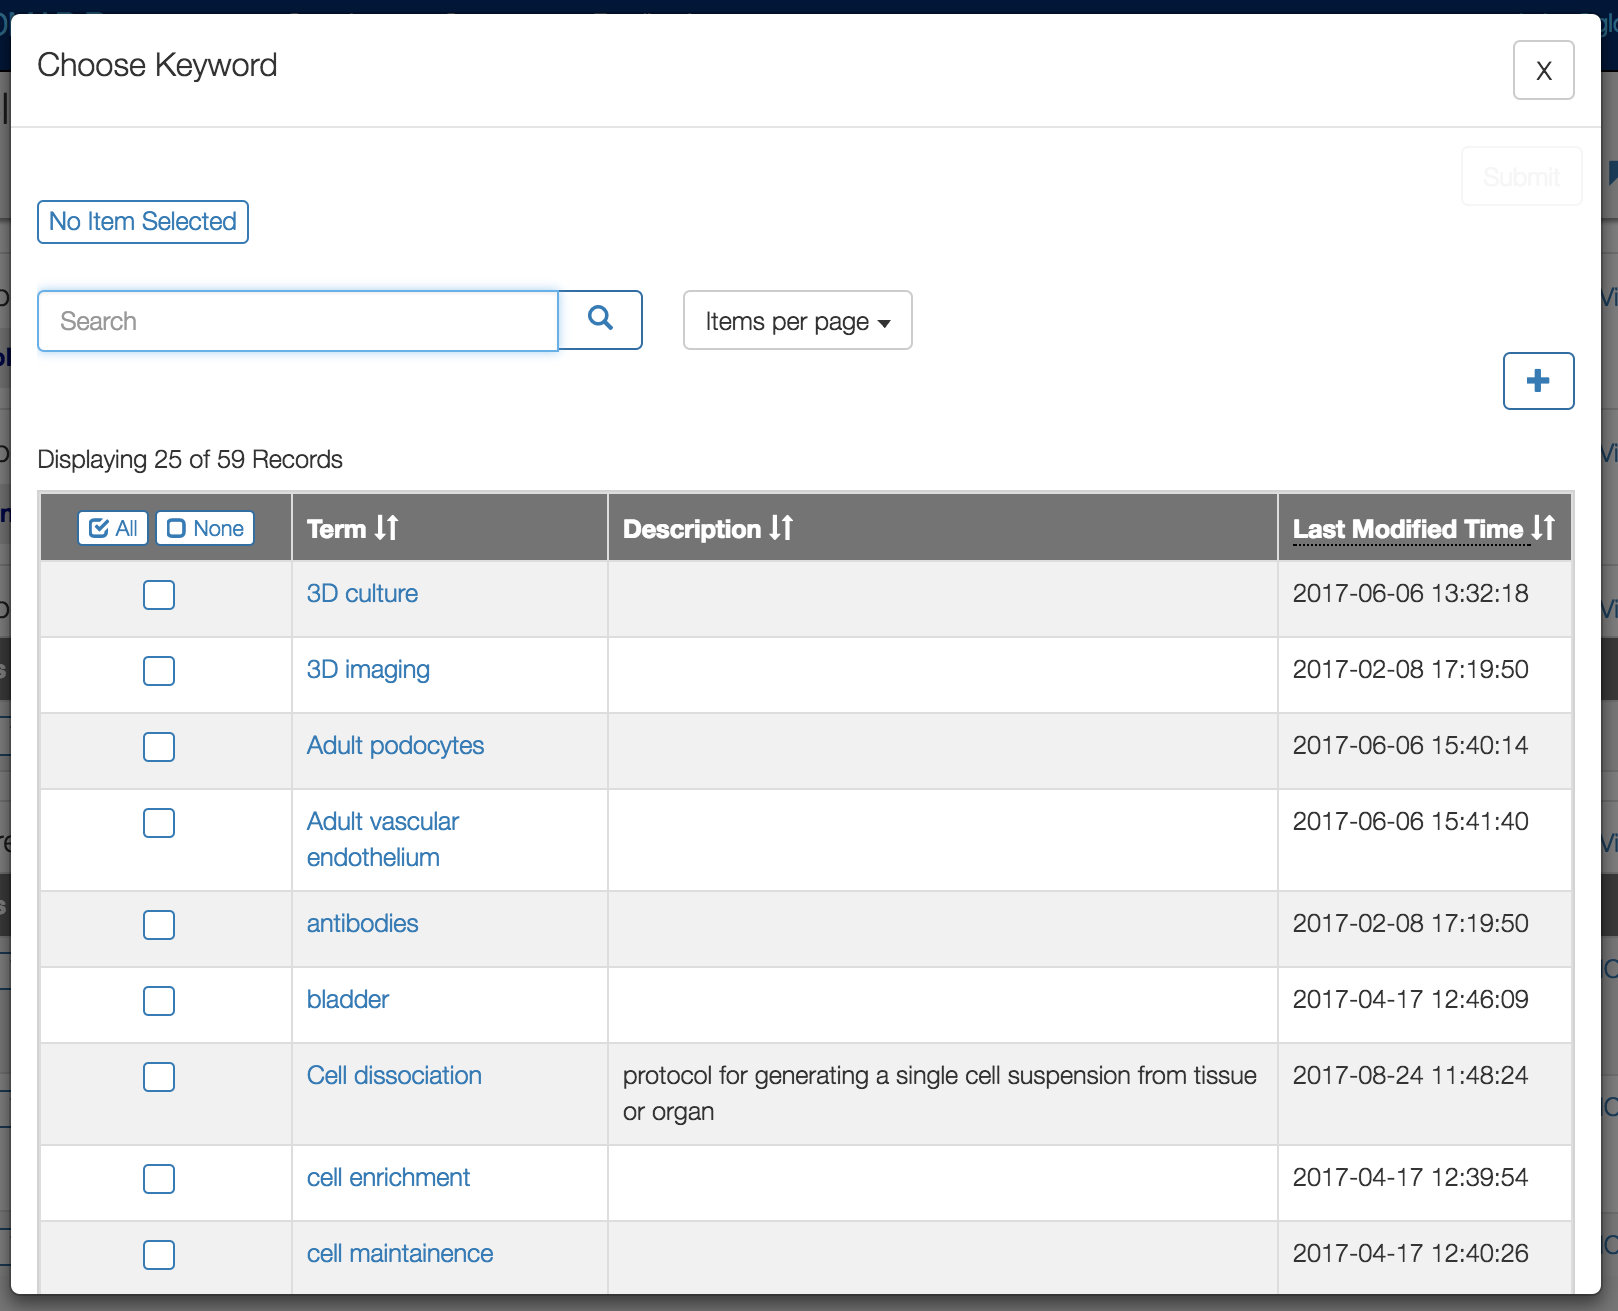
Addlink in the upper right corner of the “Protocol Keyword” section.
- In the modal window, scroll through the list…
OR
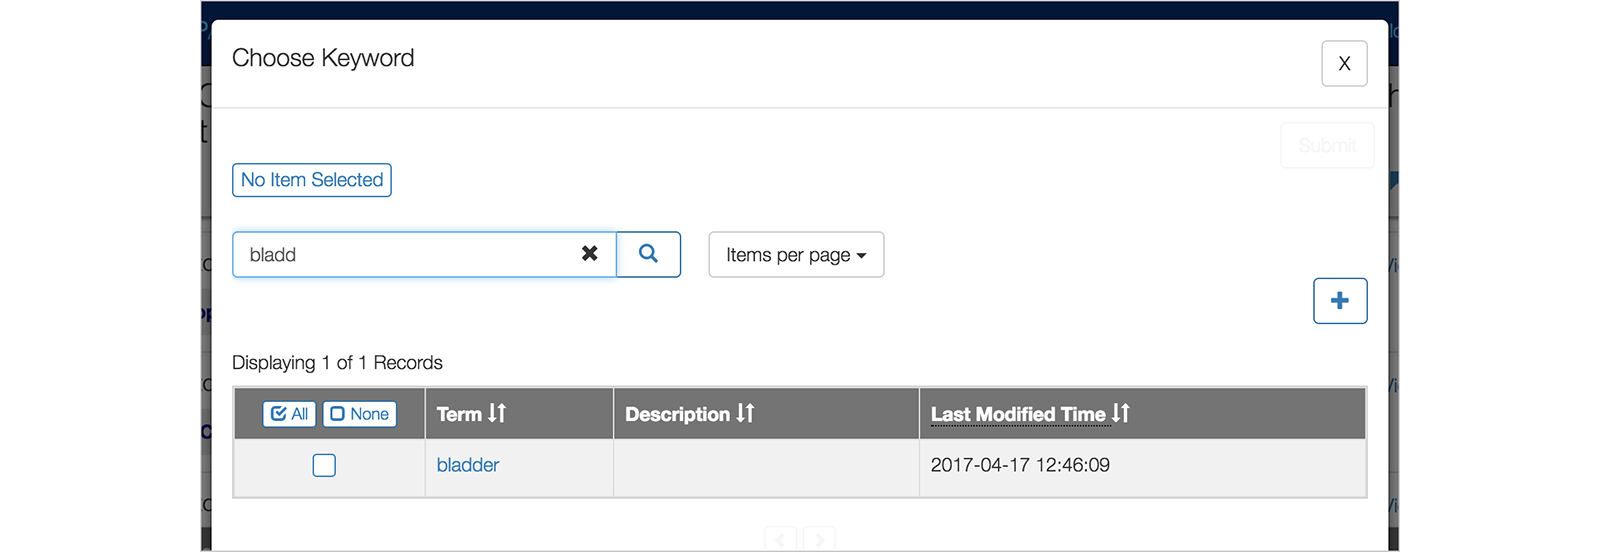
…start typing a term in the search box to narrow the results.
-
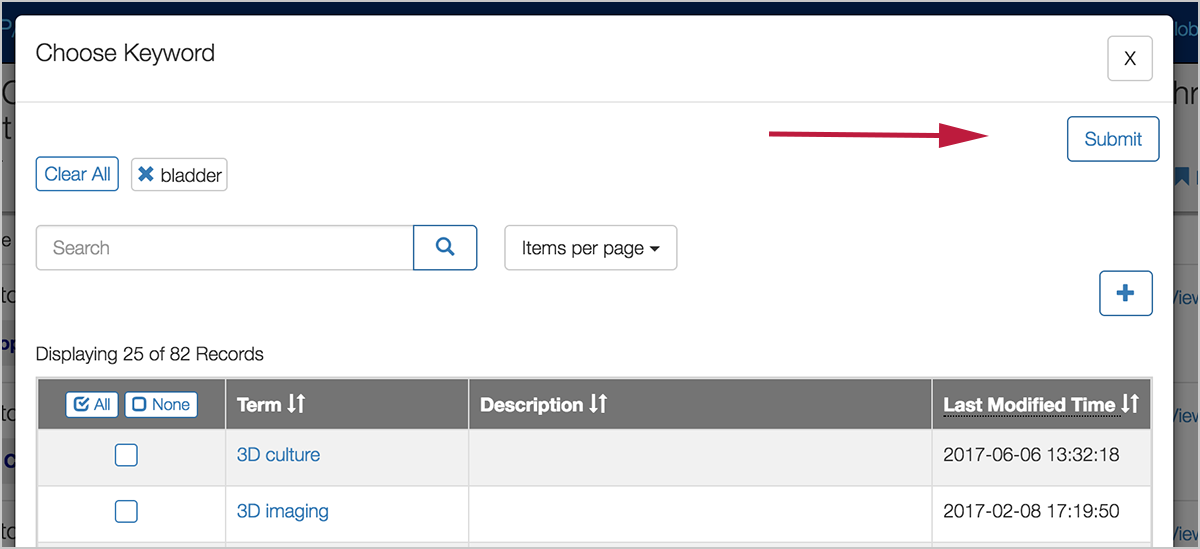
Click the checkboxes of your desired keywords.
-
When finished, click Submit in the upper right corner to save your data.
- Note that until you change the Curation Status field to Submitted, you can keep going back to a record to edit and submit (save) as much as you like.
4. Add Protocol Authors
- From your new protocol record, scroll down until you see the section “Protocol Authors”.

- Click the
Addlink in the upper right corner of the “Protocol Authors” section.

The ‘Create Protocol Author Record’ tab appears.
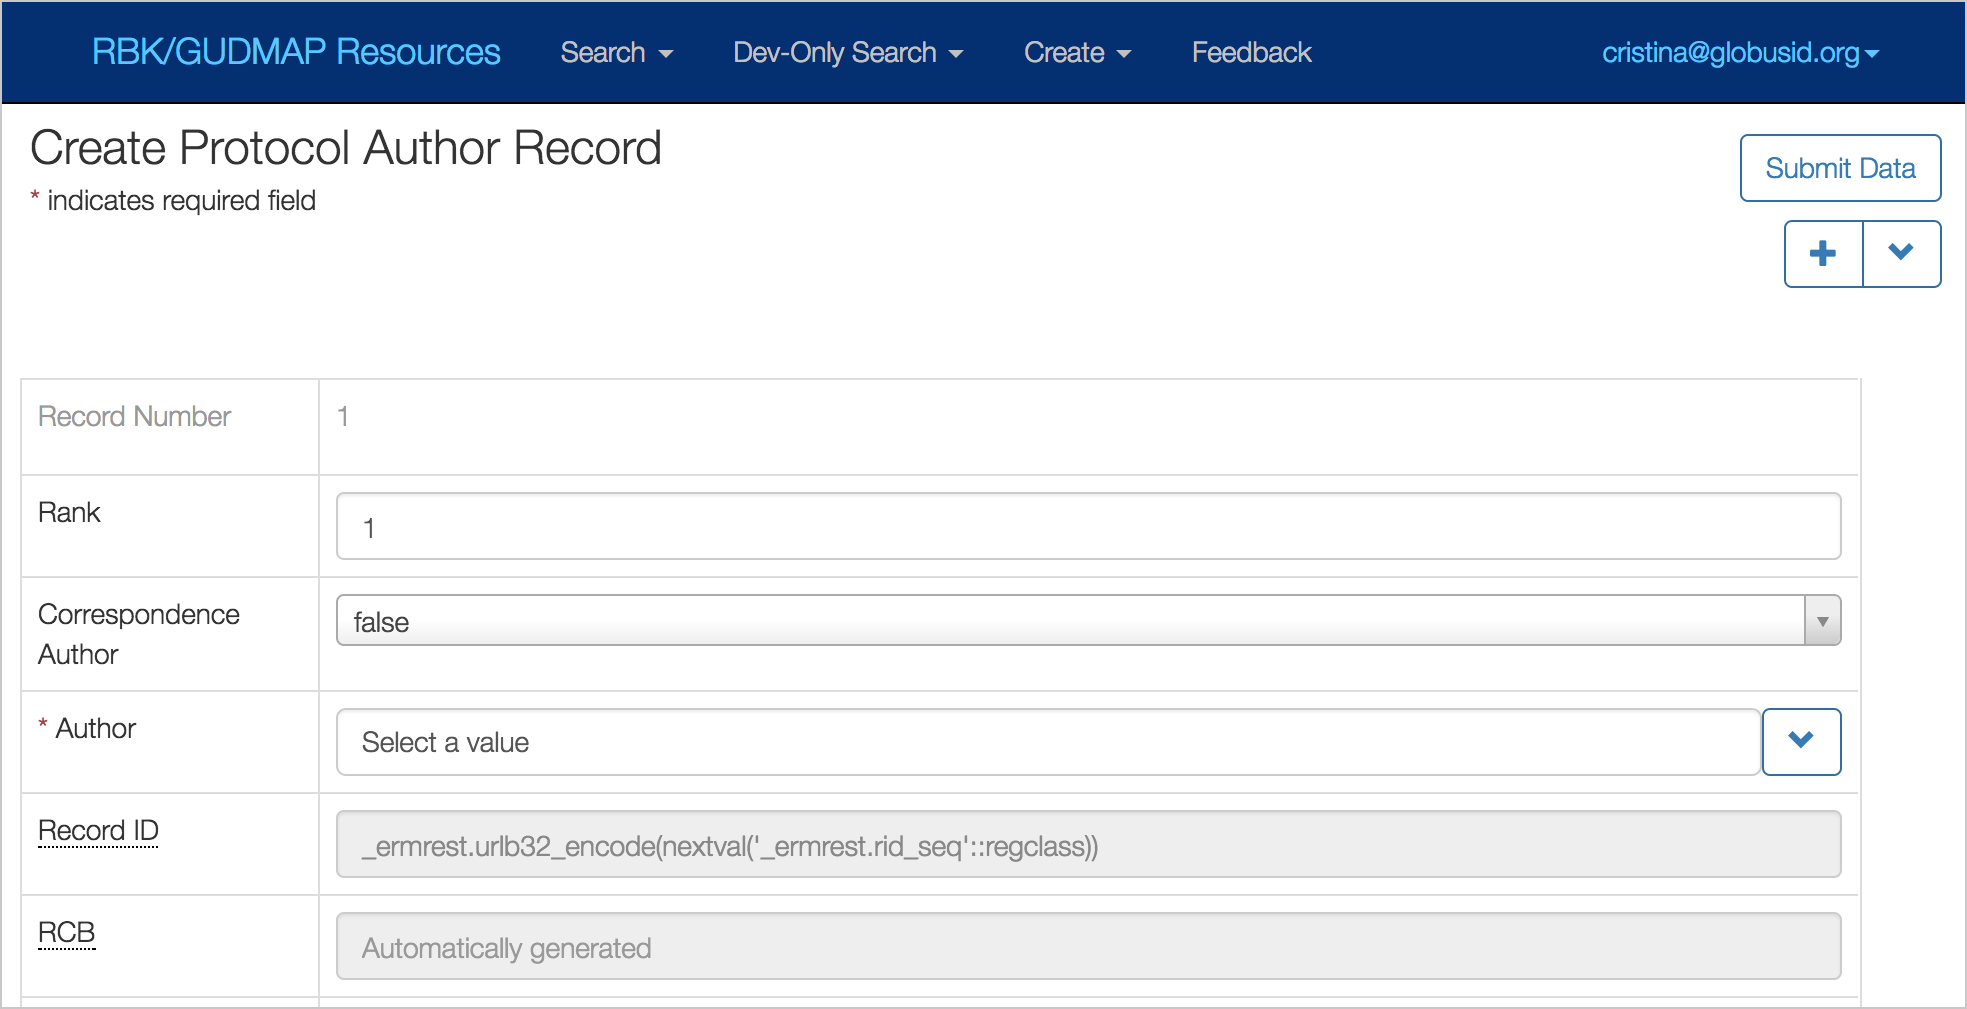
- Fill out the fields.

-
In the Correspondence Author field, select ‘false’ or ‘true’ to indicate whether this author is the contact person for this protocol.
-
In the Author field, click “Select a value”. In the modal window (next image), Search for the person you want to add and select them.
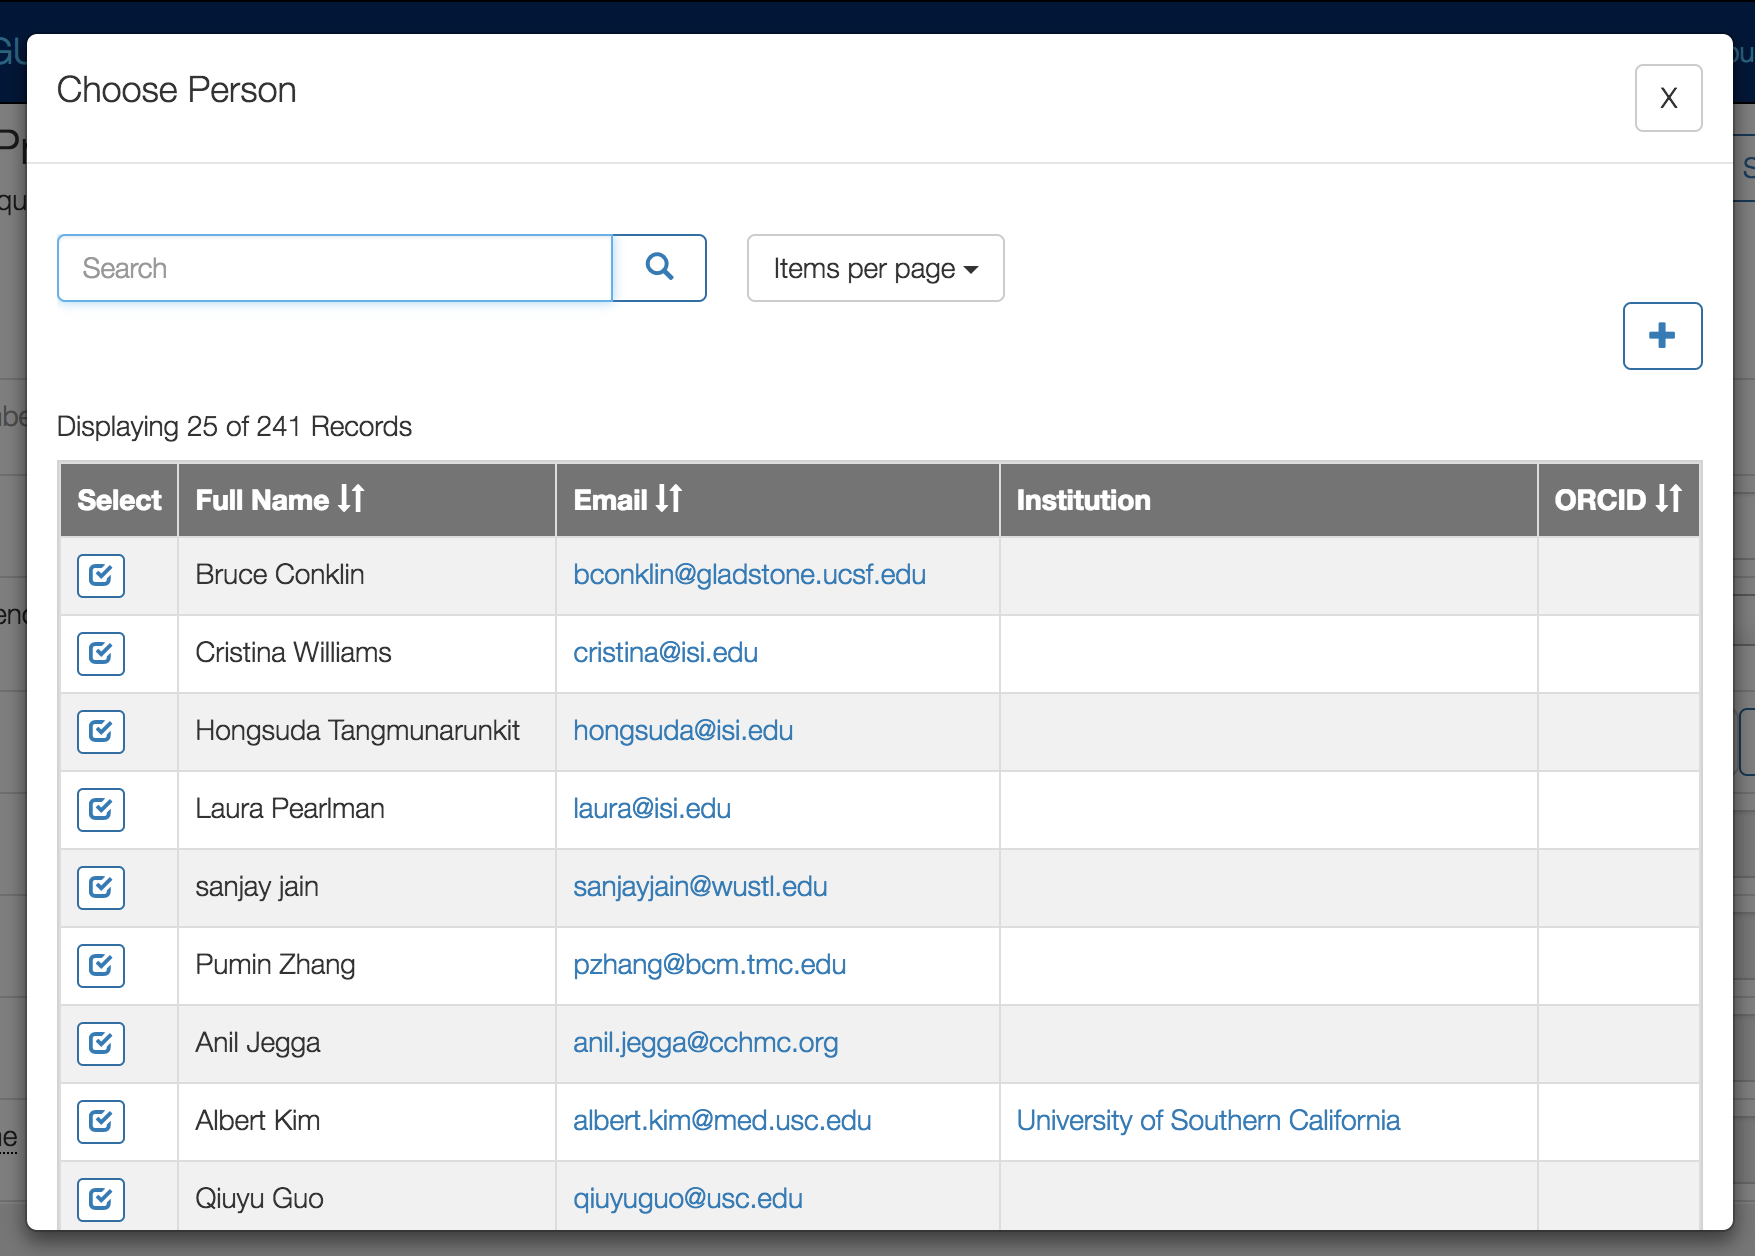
- If you cannot find the author, click the “+” button to create a new author record.
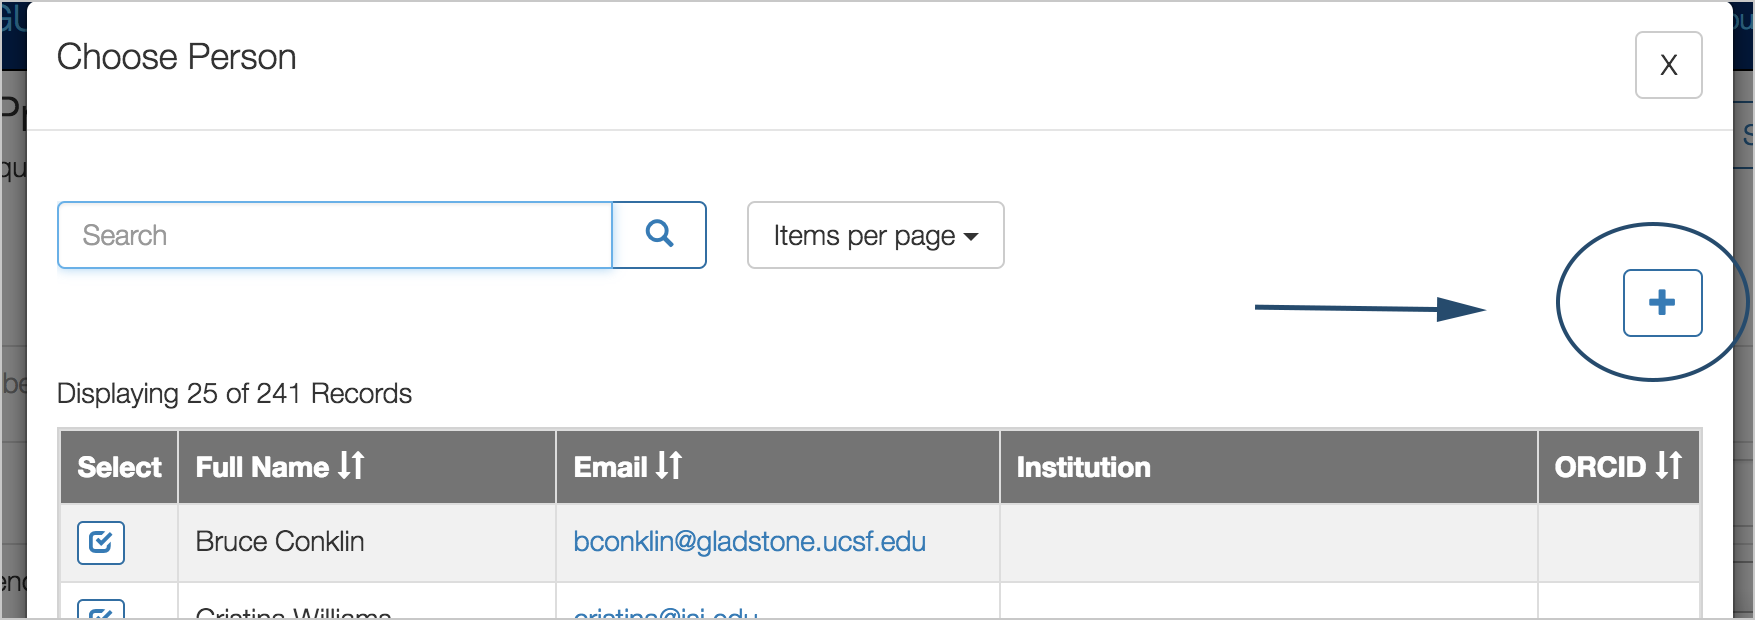
A “Create Person Record’ tab appears.
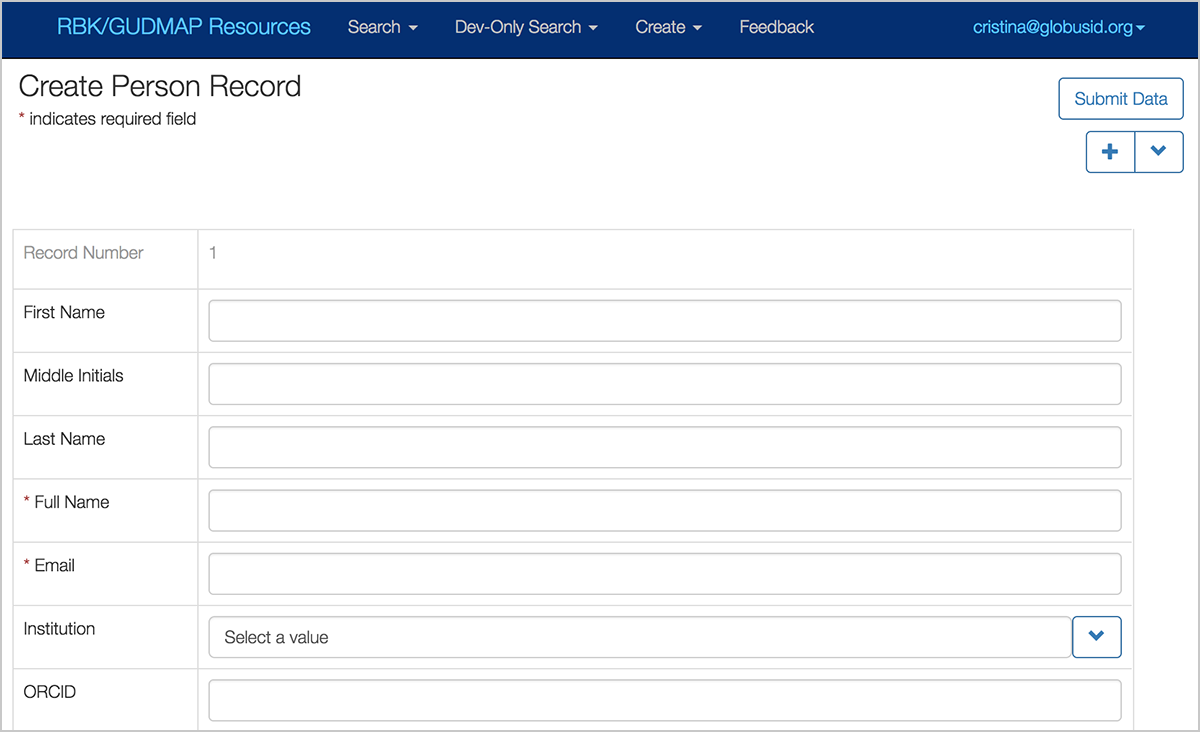
- Add the author’s full name and email address at the minimum.
- Click Submit Data. Close this tab.
- In the previous tab and click the checkbox to select the new author, and click Submit Data.
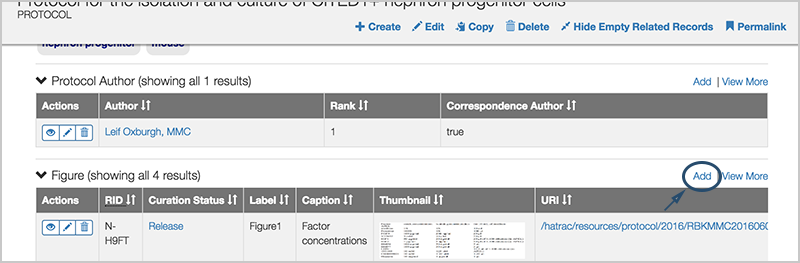
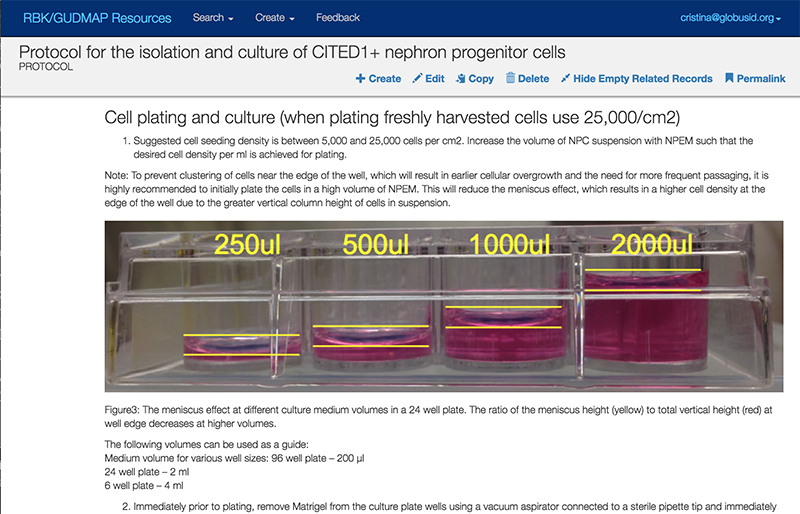
5. Add Figures
Note: The ‘Figures’ section was primarily intended for adding images to a protocol but is also useful for videos or other supplemental files. For simplicity, we’ll refer to image files below.
The process of adding image files to a protocol is two-fold: you add the file to the Figures section and then embed it where desired in the base protocol.
- Make sure you are logged in, then navigate to the protocol where you want to add the figure (in the navigation bar, click Data > Protocol > Protocol).
- Scroll down to the Figures section and click
Add. A new tab appears with a form.
- Fill in the fields and then upload your figure in the URI field by clicking Submit File, navigating to your file and clicking Open.
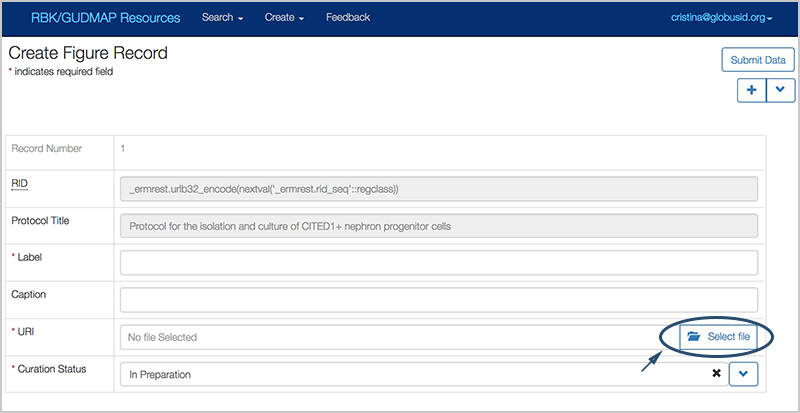
- Save the record by clicking Submit Data. Your figure now appears in the Figures section.
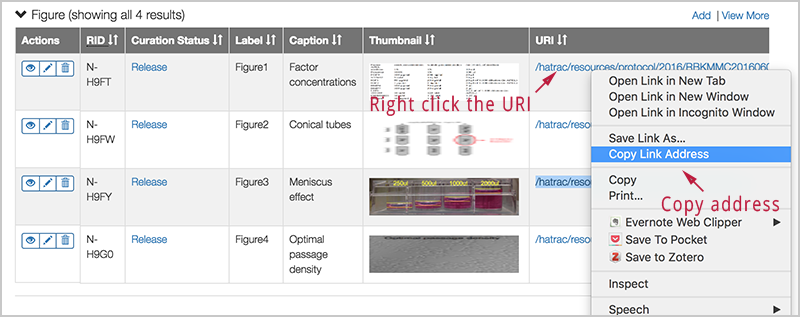
6. Embed Figure in the Protocol
Note you can only embed an image file. For video files, you may only add a link to the URI for the figure (for information on how to add a link, see Formatting with Markdown).
- In the Figures section, copy the URI field (the link to the image on our system).
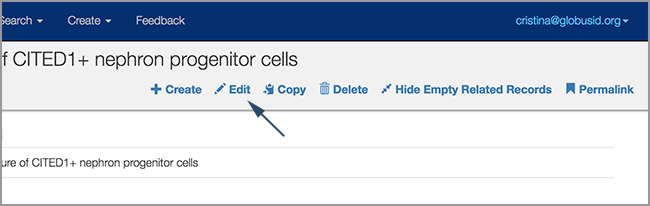
- Scroll back up to the top of the protocol and click Edit.
- In the desired field, use the following Markdown format (similar to a markdown link but with an exclamation point at the beginning):

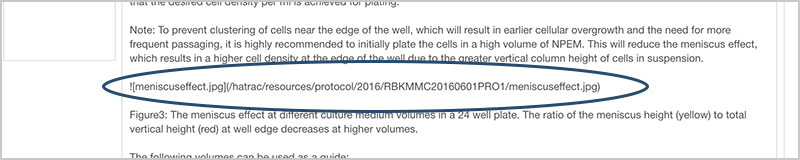
You can also click the Images icon in the formatting toolbar and paste the URL in the popup window.
![]()
- Your figure now appears in the text field.
7. Reviewing and Submitting Protocols
Note: Here is how a project’s PI or designated reviewer can find their project’s data with a Curation Status of “PI Review”
-
Make sure you are logged in.
-
From the navigation bar, click Data > Protocol > Protocols.
-
In the faceting sidebar on the left, scroll to Curation Status and choose PI Review. Note: Keep in mind that the data submitter may have forgotten to set the Curation Status field, in which case the status would still be In Preparation.
-
In the faceting sidebar, scroll to Principal Investigator and choose your project’s PI. Now you should see the data you need to review.
-
When your record is approved internally, change Curation Status to Submitted to send it to the Hub (click here for the full Curation Workflow). It’s a good idea to also send email to the Hub to let them know your protocol has been submitted (help@gudmap.org or help@rebuildingakidney.org).
8. Versions of Protocols
Sometimes a protocol needs to be updated due to things like cheaper reagents or better processes.
Protocols include a Version field to help distinguish between these. Here are some guidelines for using this field.
If the investigator feels their protocol is a significant difference from the original, AND data on the ATLAS-D2K website that links to the protocol cannot be replicated with the old version, create a brand new protocol and update the Version field by one “whole” number (ie, from “1” to “2”).
If you only need to add a clarification or a note, or if a reagent source is substituted that does not change the outcome of the protocol (but saves money, for example), then edit the existing protocol and update the Version field by a “point” number, (ie, from “1” to “1.1”).
Investigators are responsible for determining title changes when a protocol changes. If you are moving a whole number (the first case above), we recommend updating the title to better reflect the change.
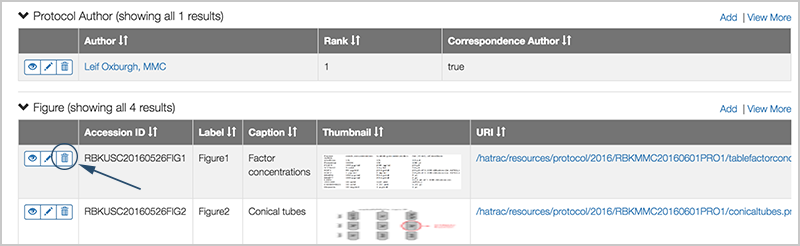
9. Deleting Protocols
Before you can delete a protocol, you must first unlink (delete) any records associated with it. This means ‘un-linking’ the keywords, subject terms and authors.
-
First, make sure you navigate to the protocol you wish to delete and are logged in.
-
Scroll down below the base protocol until you see the ‘Protocol Subject’, ‘Protocol Keywords’, ‘Protocol Authors’ and ‘Figures’ sections.
-
For the ‘Protocol Subject’ and ‘Protocol Keywords’ sections, click Edit in the upper right corner of the section.
Then click the “x” icon in the Actions columns to delete (un-link) each and every record in that section.
-
For the ‘Protocol Authors’ and ‘Figures’ sections, click the ‘garbage can’ icon to delete each and every record in that section.
- Once all of the related records are deleted, scroll back up to the top of the protocol and click the “Delete” link.
